
|
The Internet's Largest and Fastest Growing Engraving Community
Discuss hand engraving using basic to the most advanced methods and equipment
Forum Members: 14,741. Welcome to our newest member, 3012Sd
EngravingForum.com -
Domain since Feb 7, 2003
 Graver Video Conferencing is empty Join now!
|
|||||||
| ENGRAVING TOOLS - Paypal accepted | Classes | Glossary | Feedback | Tips | Sharpening | Bulino | Videos | Forum Policies |
 |
|
|
Thread Tools |
|
#1
 05-29-2008, 10:16 AM
|
||||
|
||||
|
I have Bruce Christensen in this week from Salt Lake City to study engraving and to create some layout patterns for odd-shaped knife bolsters and other custom knife parts. One of the adjustments we made to Bruce's style was to extend some of the floral detail (not the scrolls) outside the borders - I think it adds some artistic flare when you do not confine your work to specific borders. Be more creative about how you approach scroll development. Study Ron Smith (Drawing And Understanding Scroll Design) and Lynton McKenzie (Smoke Pull Book) for lots of creative inspsiration.
The first plate in the sequence shows basic scroll (single line) detail extending through/interfering with other scroll - please understand that these lines would not occur in finished engraving, but are part of learning to flow scroll in a defined space. (photo 1) We also created a multi-color floral inlay for a knife belt hook and some raised/relief work on the steel plate (photo 2) Bruce has enjoyed using the PalmControl and Lindsay Classic creating the work in these photos. The three added photos of the Height Adjustable Block Table are placed to reply to responses that came after the original posting, i.e., asking about that special feature of my work bench set up. Mike Dubber  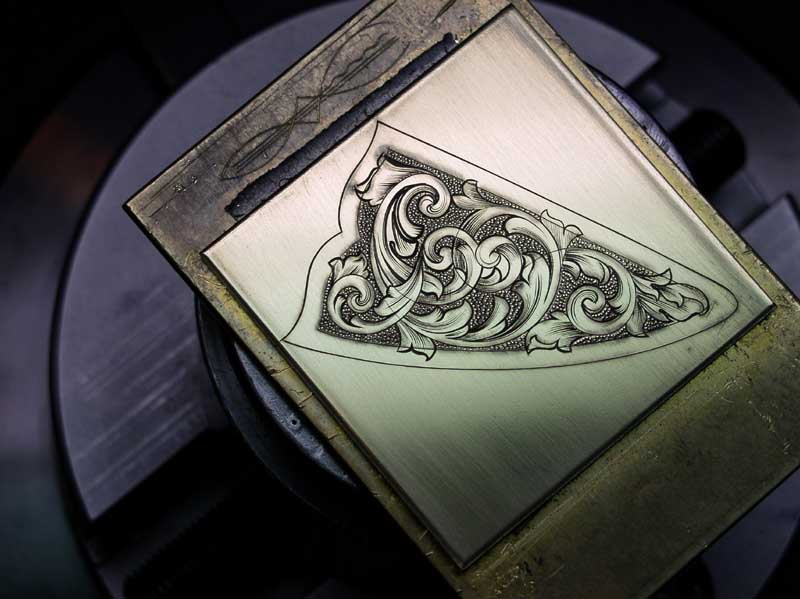 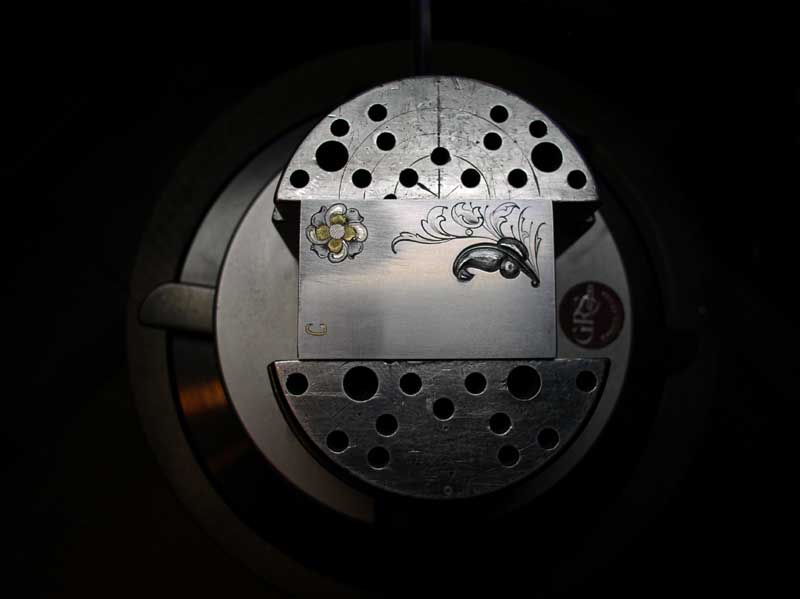 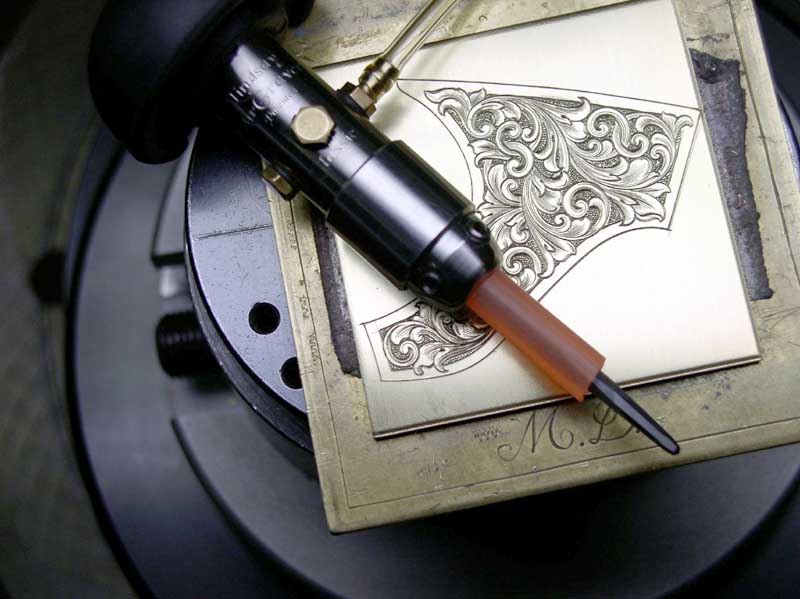 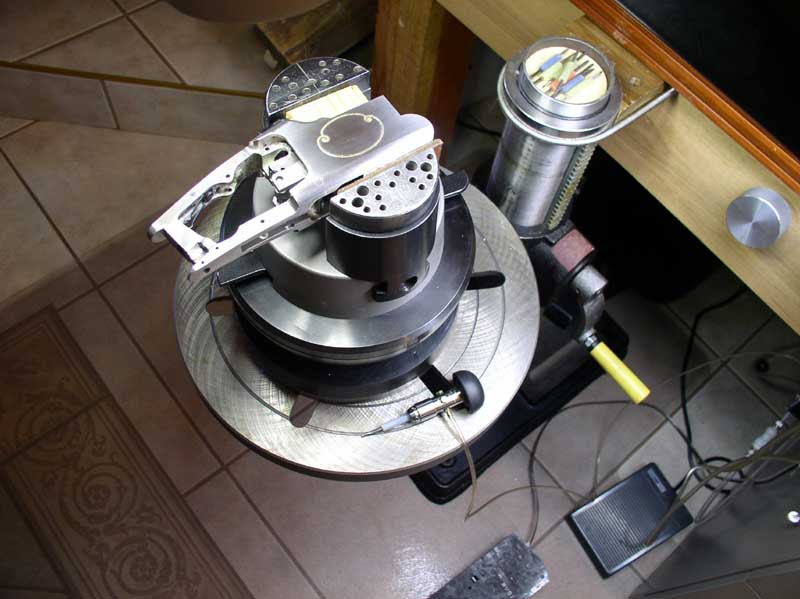 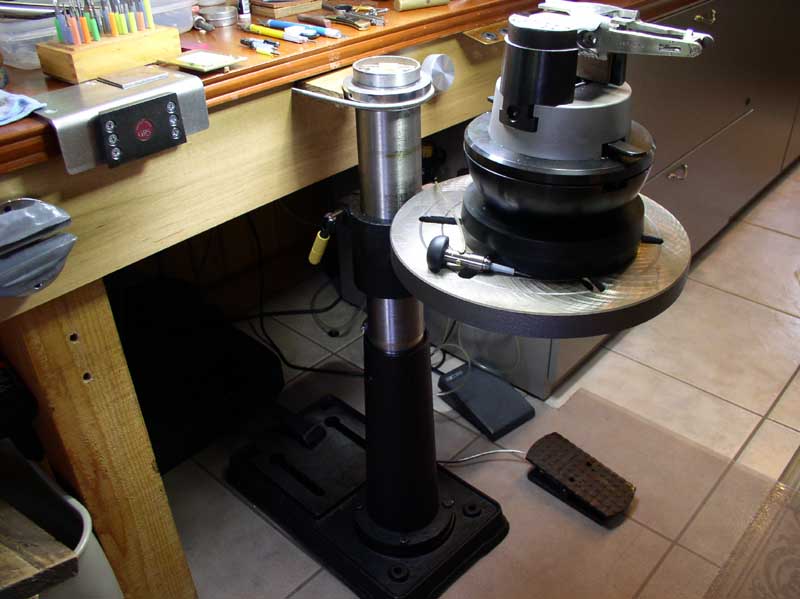 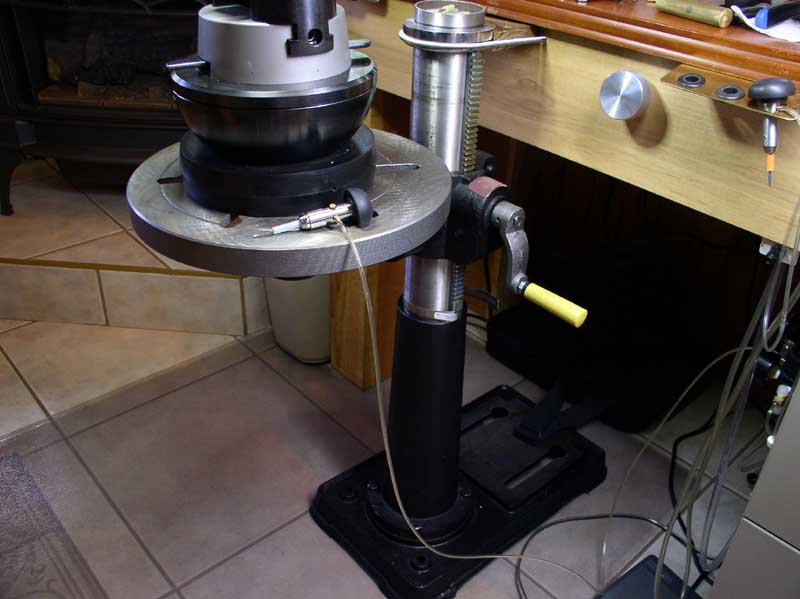

|
|
#2
05-29-2008, 11:22 AM
|
||||
|
||||
|
Wow that's nice!
 I especially like some of the subtle bits in the second image, where the scroll almost fades into the background as it passes under the other scroll. Great use of shading!
|
|
#3
05-29-2008, 12:03 PM
|
|||
|
|||
|
Hi,
Very nice bench set up. Very Nice work also. I especially like the adjustable vice set up using what looks like a drill press table set up for moving the vice up and down. Very clean. How did you make that? Do you have more pictures of the vise mount set up? Mike
|
|
#4
05-29-2008, 01:24 PM
|
||||
|
||||
|
Yes, you are correct, the base that my block is setting on is, in fact, a drill press base. I'm not sure who suggested it first, but I believe it was Rex Pedersen who did an article in the FEGA newsletter about it.
Unless you can find and old drill press somewhere else, the best bet is to go to your neighborhood Harbor Freight store (or go on-line) and buy one thier cheap Chinese drill presses ($165.00 to $185.00) and saw off the colunm and rack at the correct height to fit under your bench top (take the motor and drill apparatus and throw that junk away). What's left is a nice heavy cast iron base and articulating arm and table. Secure it under your bench top in some creative fashion and you have an block table that is height adjustable ( mine runs up and down 12"). Better yet, the table can be loosened and used (lazy susan style) to revlove your block if you want. Even better, Rex sent me a flat auto transmission bearing with the correct size opening that I placed between the revolving base and the articulationg arm arm that makes it run as smooth a glass! I use that a lot while engraving under the scope....it's smoother than the rotation of my block with the clutch opened fully! Also, before anyone else asks about it, Tim Wells invented the practice plate holder shown in the shots above. They provide a solid platform for practice plates that are secured to the brass base with double sided duct tape - a square billet is soldered to back and placed in the jaws, allowing the vise jaws to close up so your hand is'nt spread wide open - providing a comfortable hand-hold on the block. I begged him to make a couple for use during my classes. He was gracious in doing so, but he engraved the "MD" on the one shown here - so don't blame me for that (actually, he's improved his lettering and his engraving skills a lot since then!). "MD"
|
|
#5
05-29-2008, 01:39 PM
|
|||
|
|||
|
Thanks Mike,
The Trans. Bearing idea is also a great idea for the setup. I will start looking for a drill press stand on craig's list. Too bad I just sold a Ridged Drill press and could have cut that one up. airamp
|
|
#6
05-30-2008, 08:53 AM
|
||||
|
||||
|
Thanks for the pictures, I like to see pictures of peoples work space. I have learned alot just looking at a spot where a person works. Thanks also for the ideas on layout and design. I know that I need alot of work in that area. Sometimes you can look at something for a long time and not see something and then along comes a picture and a description that sets of a light bulb. You just did that for me.
Thanks, Neil 
|
|
#7
05-30-2008, 09:42 AM
|
|||
|
|||
|
posting pics of your work areas is a great idea. little things that one might do different offer another ave. for someone else.
i like the rubber tube at the base of the graver. different colors for different types. simple is always the best
|
|
#8
05-30-2008, 06:46 PM
|
||||
|
||||
|
I buy my tubing at a local model/hobby shop. The material is Silicone Fuel Line - used for model cars and airplanes. I'm not sure how consistent it may be industry wide, but I buy the Medium size fuel line. It comes in a variety of colors and fits 3-32" graver blanks just right without slipping. I use yellow on my Universals, green on my Detailing, and red and blue on the Bulinos and others. In fact I have some very special gravers I use or high relief work (to clear obstacles like on the crane of a SAA) that I fit with two colors of tubing on the shank of the graver - they are easy to identify and don't get mixed with the standard grinds.
Mike Dubber
|
|
#9
05-30-2008, 08:28 PM
|
||||
|
||||
|
Steve noted in another thread that you can use a rotary tool to 'write' on the graver what it is and then use the clear tubing.
I can see going either way - since you know your color code it's faster and easier than looking for numbers but conversely with the numbers you know what graver it is.
|
|
#10
05-31-2008, 11:16 AM
|
||||
|
||||
|
You guys are just a wealth of info. I learned from Steve Dunn to use model paint and paint a small dab on your collets that hold your gravers to color code them. It works well too.
Neil
|
|
#11
05-31-2008, 07:15 PM
|
||||
|
||||
|
Neil
That's another good idea! :thumbsup: I think the key is just the idea of doing something to mark your different gravers so you can tell which is which.
|
|
#12
05-31-2008, 11:30 PM
|
||||
|
||||
|
Mike,
I see you've done some remodeling of the far bench since I was the first ginea pig many months ago. Looks a lot better that way and you can see the "fire" better in the winter time. I wish I'd cut those initials on the bottom of that plate now so nobody could see them! They're awful; but I'll make you another one so you can throw that one away or cut that end off. I think I'll cut your initials again but I bet you'll see a marked improvement over those last ones since I took some of your instruction. To be continued...
__________________
"If one needs a tool, and does not acquire it, they end up paying for it, but not having it." - Henry Ford
|
|
| Bookmarks |
|
|


